
7 Common Mistakes to Avoid When Installing Baseboard Heater Covers (And How to Do It Right)
Baseboard heater covers are one of the easiest ways to refresh a space—but only when installed correctly. Whether you're a DIY enthusiast or a seasoned handyman, a smooth, safe, and professional-looking baseboard heater cover installation comes down to the details.
Unfortunately, it’s all too common to overlook key steps, leading to loose fittings, unsafe setups, or unsightly results. In this guide, we’re covering the most common baseboard heater cover mistakes—and how to avoid them—so you can complete your project with confidence.
1. Skipping the Prep Work
Before you install anything, preparation is key. Many DIYers rush in without checking the heater’s condition or clearing the area, which can lead to problems down the road.
What to do instead:
- Remove old covers and thoroughly clean the area.
- Vacuum around the fins to remove dust and debris that could reduce heating efficiency.
- Check for any damaged fins or brackets that might interfere with your new cover.
Pro Tip: Baseboarders® covers are designed to fit over most existing heaters, but damaged fins should be bent back or repaired before installation.
2. Choosing the Wrong Cover Size or Style
A common pitfall is ordering the wrong size or style, leading to poor fit or mismatched aesthetics.
What to do instead:
- Remove the existing front cover then measure from pipe to pipe or existing back plate end to end (whichever is longest), rounding down to the nearest whole inch (e.g., 72.75” = 72” panel). You’ll may also need height (floor to the top of existing back plate) and depth (wall out to the front of heating fins) measurements.
- Choose a cover style (Premium, Basic, Elliptus, or Premium Tall) based on your system type and home’s look.
Need help choosing? Our team at Baseboarders® is standing by to help with layout planning and selecting the right fit for your space: sales@baseboarders.com or 844-801-6429

3. Forgetting to Check Whether You’ll Need Wall Brackets
Our covers are able to slide over an existing back plate but they can also be secured to wall brackets. Use wall brackets for installation when the back plate is no longer on the wall or if it is not tall enough (min. 7 ½" tall from floor). Please note that wall brackets are not included in orders and should be ordered separately if needed.
What to do instead:
- Use the included wall brackets or optional clips to secure the back plate, especially on uneven or bumpy walls. Check to see that your back plate is secure, leaving space for lip of the new baseboard heater cover to slide behind the plate and the wall.
- Do not place screws or nails near the top of the back plate so you don’t impede the area where the lip of the new cover will be (¾" from the top).
- Ensure the back plate or wall brackets are level before attaching the cover for a snug, clean finish.
4. Overlooking Safety Clearances
Installing covers too close to flammable materials can be a safety hazard.
What to do instead:
- Maintain adequate clearance around the heater cover.
- Avoid placing furniture, curtains, or other objects too close to the covers.
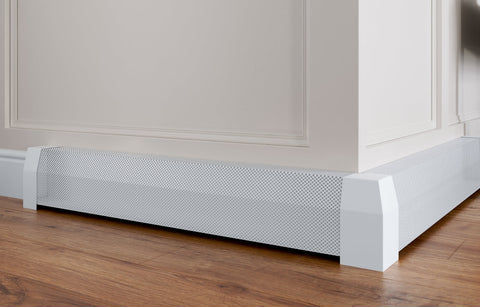
Safety first: All Baseboarders® products are made from powder-coated steel, not plastic, for superior fire resistance and durability.
5. Neglecting Endcaps and Couplers
Endcaps and couplers aren’t just finishing touches—they’re essential for proper fit and safety.
What to do instead:
- Use endcaps to cover each end of the panel to create a clean, finished look.
- For heaters longer than 7 feet, use couplers to join two panels seamlessly.
A well-installed endcap can be pulled out up to 1.75" of adjustability, giving you extra wiggle room to get the fit just right.
6. Installing in the Wrong Order
Installing a new baseboard heater cover is very simple, but it’s made even easier if you follow this pattern.
What to do:
- Start by attaching the back plate or brackets (if using).
- Place endcaps on the cover (before installing).
- Then slide on the front cover panel last.
Baseboarders® covers are designed for tool-free front panel installation, making it easy to finish things up cleanly.
7. Ignoring Manufacturer Support
Many DIYers try to figure things out on their own and miss out on valuable expert help.
What to do instead:
Don’t hesitate to reach out. Baseboarders® offers personalized support, whether you’re a homeowner or trade professional.
You can also explore helpful installation videos, layout guides, and custom cut options on our website.
A Simple Update That Makes a Big Difference
- Installing baseboard heater covers might seem like a small detail—but done right, it transforms your space. By avoiding these seven common mistakes and following these tips, you can ensure a safer, sleeker, and longer-lasting result.
- Need help with your project? Check out our Installation Guide for step-by-step instructions tailored to your heater type.
Related Questions
Q: Can I install baseboard heater covers myself?
A: Yes! Baseboarders® are designed for easy DIY installation with no tools required for the front panel.
Q: What tools do I need?
A: You’ll need a tape measure and possibly a drill if anchoring the back plate. Most homeowners find the installation refreshingly simple.
Q: Will covers reduce heating efficiency?
A: Not with Baseboarders®. Our designs are optimized for airflow and safety—your system stays just as efficient, with a better look.